Working Your Wood
Fixing Fractures in Wood
Steaming
Place a rack made of empty tuna style cans with lids and bottoms removed in a large pot with enough water to barely reach the top of the can rack. (Note: if the the cans cannot have the bottoms removed, punch holes in the bottoms and then fill from the top.) Bring the water to a slow boil, put wood on the top of the cans, and allow wood to steam until wood is pliable enough to adjust the fracture into the desired position.
Apply wood glue to the mend and clamp or tie repair until very dry. (Do not rush drying time in order to obtain a tight bond!)
If the piece is too large to fit inside the pot, position fractured area across the top of the pot and allow the steam to rise until repair area is soft enough to be put back into place and glued as per above.
Handling Cracks in Wood
Some of the cracks are larger and would not be effectively concealed by steaming or filling. Then the artist might elect to open them more and blend this into the overall design of the sculpture. The technique for handling these cracks is to round out the edges with your tools, clean and sand out the interior and using sandpaper completely smooth the entire inside and edge.
Those cracks that are very thin can be corrected by filling with wood glue (use a dental pick to make glue penetrate) then sand over the crack to cover the glue with sawdust.
Patching Voids and Breaks
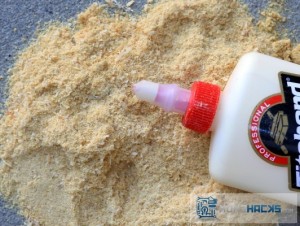 Always keep a supply of sawdust to mix with wood glue to make effective putty to close breaks and full voids. Having sawdust of a similar color is a great help in diminishing the repair. There are also wood glues of darker colors which help with the camouflage. Just remember never use sawdust you have sanded off with sandpaper, as that contains grit that will not burnish. Shop sawdust or sawdust you have saved from a sawing off of an unwanted piece of your sculpture is wonderful! When some of your sawdust is coarser than desired, use a salt shaker or tea strainer to obtain the finer wood. Save the coarser wood to stuff into the bottom then make your glue and sawdust putty, apply with a dental pick and smooth off the surface. Before you start this putty filling, wet the area to help ensure a tight bond. Also, use a wet finger to help smooth the top surface. This patch might shrink as it dries, so expect to re-apply this glue and wood paste several times. Then about 30 to 40 minutes later try making grooves in the patch or whatever you might need to blend this into the pattern in the rest of the wood. Do not continue working on the rest of the pice until the patch is dry, even wrap it in Saran Wrap or foil to keep it in place until dry. After it is dry it can be sanded. If the color is off the patch can be stained, oiled, or slightly burned to help blend it to the color of the surrounding wood.
Reinforcing Thin Areas
This should be called how to strengthen thin wood areas. One of our members found that wetting and then painting thin wood with wood glue makes the wood stronger when dry. Use of wood hardeners should be tried with great caution. Benite and Benmatte, both Day’s products are useful wood hardeners. Use the clear form and wood will not darken when dry. Some people have allergies to these products, so always use them in a well-ventilated area. Boiled linseed oil and turpentine mixtures will also work as a wood hardener. Two-thirds to one-third formula. Apply with steel wool or sandpaper working it in. you may need several applications. This mixture will darken woods. Always use these above products with care and be sure to allow them to dry thoroughly before doing further work on the sculpture. Allow 4 to as long as 8 days. Always use boiled linseed oil as regular linseed oil takes weeks to months to dry. Another very difficult solution is to shave a thin veneer off another area of the wood (where it will not show) steam to soften and then glue and clamp it to the thinned area. This takes a very steady hand, sharp tools and great determination, but has been successful in the past.
Removing Unwanted Parts
Sometimes to improve the line and flow of our sculptures we need to remove a portion of the wood that interrupts that line. Nature often gives us too much of a good thing and we end up with a crazy quilt of angles, knobs and knotholes. Some of the beauty of the piece is lost in the jumble of extra parts that interfere with the overall harmony. But do not cut away these intrusions too soon. Scrape and sand until you are really convinced these parts must be removed. Start with a dark or black cloth to cover the part you feel should be eliminated. Look at it from all angles, as so many times what we first see to feature isn’t really the best aspect of the wood. Many times we try to emphasize the eagle and overlook the hidden lion (or something like that!)
Twist it and turn it to find the best presentation. Have others study your piece to see if they see another way or view that you hadn’t seen before. For example, there was one time when an ugly appendage that was destined to be removed ended up being the pivotal base of a graceful fawn. On the other hand, do not preserve that part or parts that create chaos within a sculpture. If there are more than just one part to remove, eliminate the first one, stop and review the overall look, then do that next removal and so on. Always review the decision to be sure it is what you wanted.
Sometimes shaping and smoothing that awkward appendage will be enough and it will not be necessary to totally remove it. You can always remove it later, but you can never put it back on, so be careful in those decisions.
When it is for the overall benefit of the sculpture for a limb or knot to be removed try to do it in such a way that the “Man Track” created can be easily smoothed, carved or softened to blend into the piece. Sometimes a micro-plane or rough rasp is enough to soften edges. A cut branch leaves evidence of the saw by the growth rings exposed but careful shaping and sanding will solve that problem. You are always the final word in what stays and what should go. Your “Artists’ Eye” will be your guide. Have fun and enjoy your sculptures.
